
Notes on using git
I’m currently going through the extremely helpful thoughtbot git tutorial. I want to leave some notes here for future reference.
Git Aliases
Before I get into the notes, here’s a bit about .gitconfig. This dot file is found in two locations:
~/.gitconfig: the home directory for my terminal, where theglobaloptions are setgit-project-directory/.git/.config: the.git/directory of a git repo, where thelocaloptions are set
You can add aliases and other things to the global or local configuration using the command line syntax
git config --global alias.p push
or (for a longer one):
git config --global alias.as "!git add -A && git stash"
Do a more ~/.gitconfig to view the changes, or even add more complex ones by opening the file in an editor.
At any time, I can remind myself what an alias is actually doing by running, e.g.:
git help as
Getting Confident
The first video covers some basics to get us feeling comfortable.
It starts by introducing the look of the git command line.
Git Context at prompt
A good terminal prompt will show:
- whether you are in a git repo
- what branch you are on in that git repo
- a “dirty” status symbol if there are changed and un-committed
I use iTerm2 combined with oh my zsh, which gives my terminal a great look and feel:
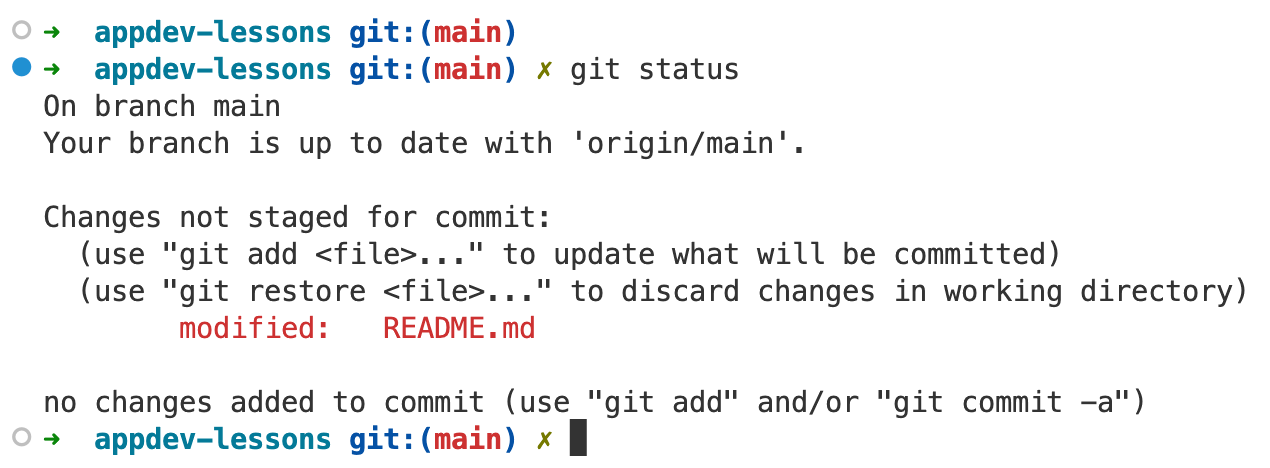
The branch is (main) and there’s a little x symbol next to the prompt when I have un-committed files.
Git Stash
git stash is the command to “stash” any changes since the last commit that you might want, or might not, and you just want to save them somewhere. Eventually the stash is deleted so this is just a temporary holding area.
I have the alias git as setup, which first adds all untracked files and then stashes them (stash only takes tracked files by default).
Reflog
The git reflog command is great, it lists every command we ran in a repo that changed what we have checked out: every commit, branch, rebase, etc.
Writing:
git reflog branch-name
shows us just the actions on that specific branch:
Note on colors
- yellow = commit hash; this is the identifier for this state of the code
- blue = HEAD; this indicates where I am currently checked out with the
->symbol pointing at a local or remote branch that I am currently on - green = local branch; this is a branch on my local machine
- red = remote branch; this is branch on Github
- black = command or commit message; this is the text describing what the line refers to
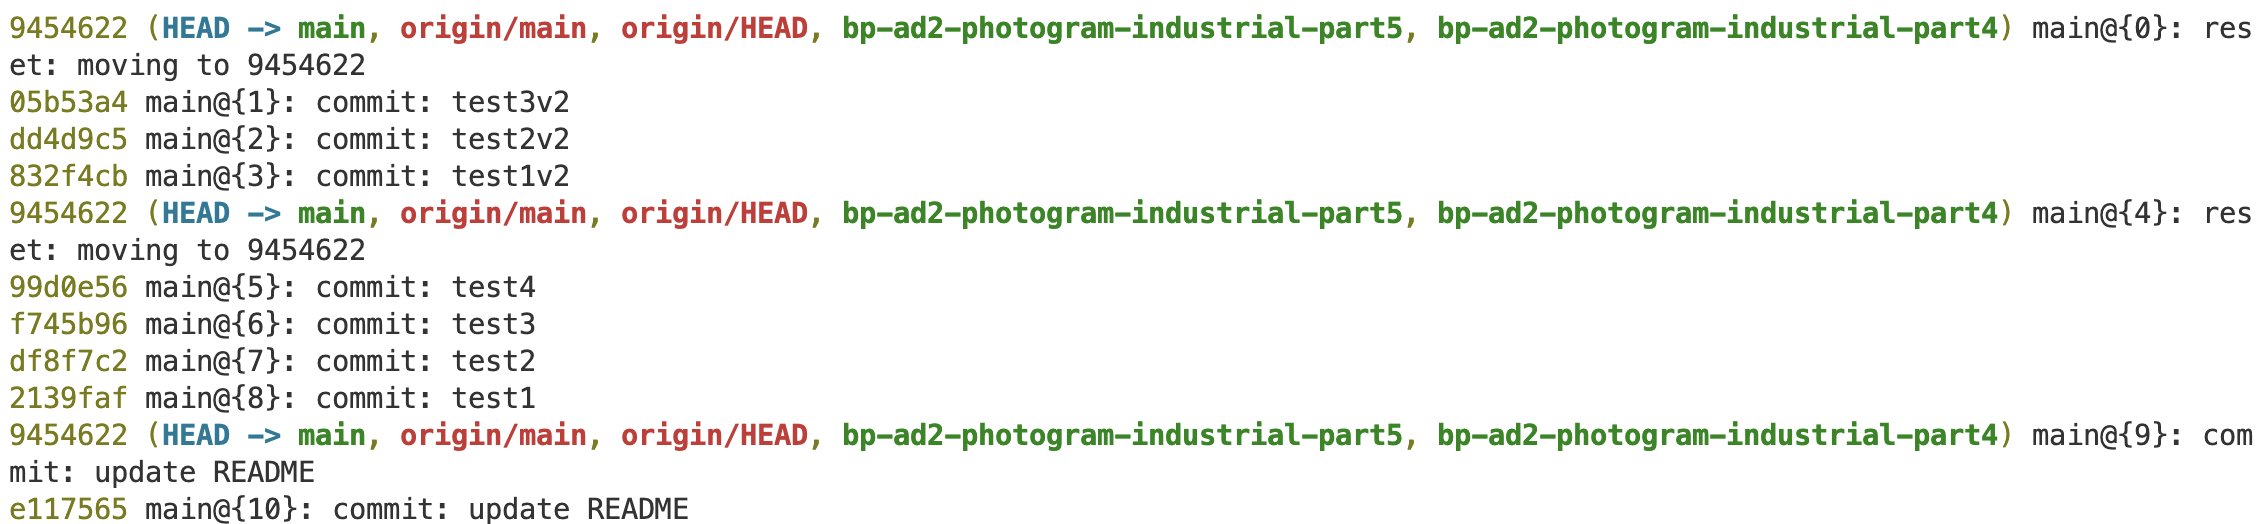
reset --hard with reflog
I can use the reflog to reset my code to any previous state! This command moves the HEAD pointer to some previous commit with the hash 9454622:
git reset --hard 9454622
With that powerful command, we don’t need to worry about messing things up!
Viewing history
The second video covers how we view the history. There’s a bunch of things in there about viewing granular details of file changes and searching the history with grep. Good to know, but here are just a few important commands.
git log
or
git log --oneline --decorate
To view a linear history of the repository. I have this aliased as git sl.
git log --pretty=format:'%C(yellow)%h%C(reset) - %an [%C(green)%ar%C(reset)] %s'
To view the commits, who made them, when they made them (in green), and the one line summary. I have this aliased as git pl.
git show 0302t5
To show the commit information and a git diff of the changed files.
The git graph
This is important but confusing at time. Recall the color notes.
git log --oneline --decorate --graph --all
To view a graph showing the relation between branches. I have this aliased as git sla.
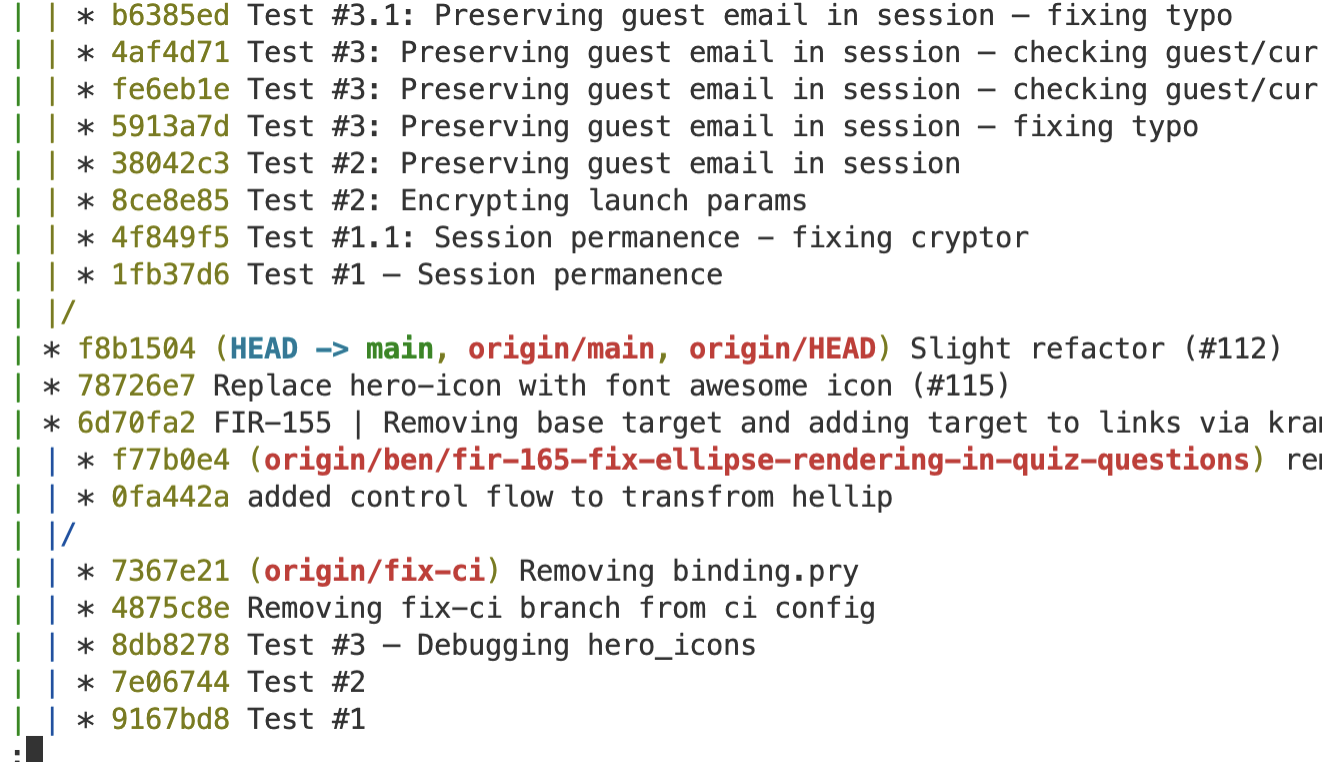
Here is a good SO answer on how to read the graph. Some notes:
- The top is the most recent, the bottom is the oldest
- Branches are
|vertical lines - The
*tells you which branch the commit is referring to. - Where two branches come together or converge (i.e.:
|\), that’s a merge. Where they split or diverge (i.e.:|/), that’s where the branch was created/taken off of. - Therefore, to read the development of a branch, start with where it splits off, read the log entries for any lines corresponding to a
*in that branch’s vertical line, and follow it until it merges again. Note that not every log entry will be relevant, only those with a*on the branch in question. Sometimes branches are taken from far back, which means they have to ‘jump over’ a lot of commits when they’re merged.
Undoing
The third video covers how we undo mistakes.
My main takeaway here, is that we can use git add file-name to add an unstaged file and then add that file to the previous commit (where maybe we left it out accidentally) with:
Ammend commit
git commit --amend --no-edit
or
git commit --amend
which will allow us to actually edit the previous commit message.
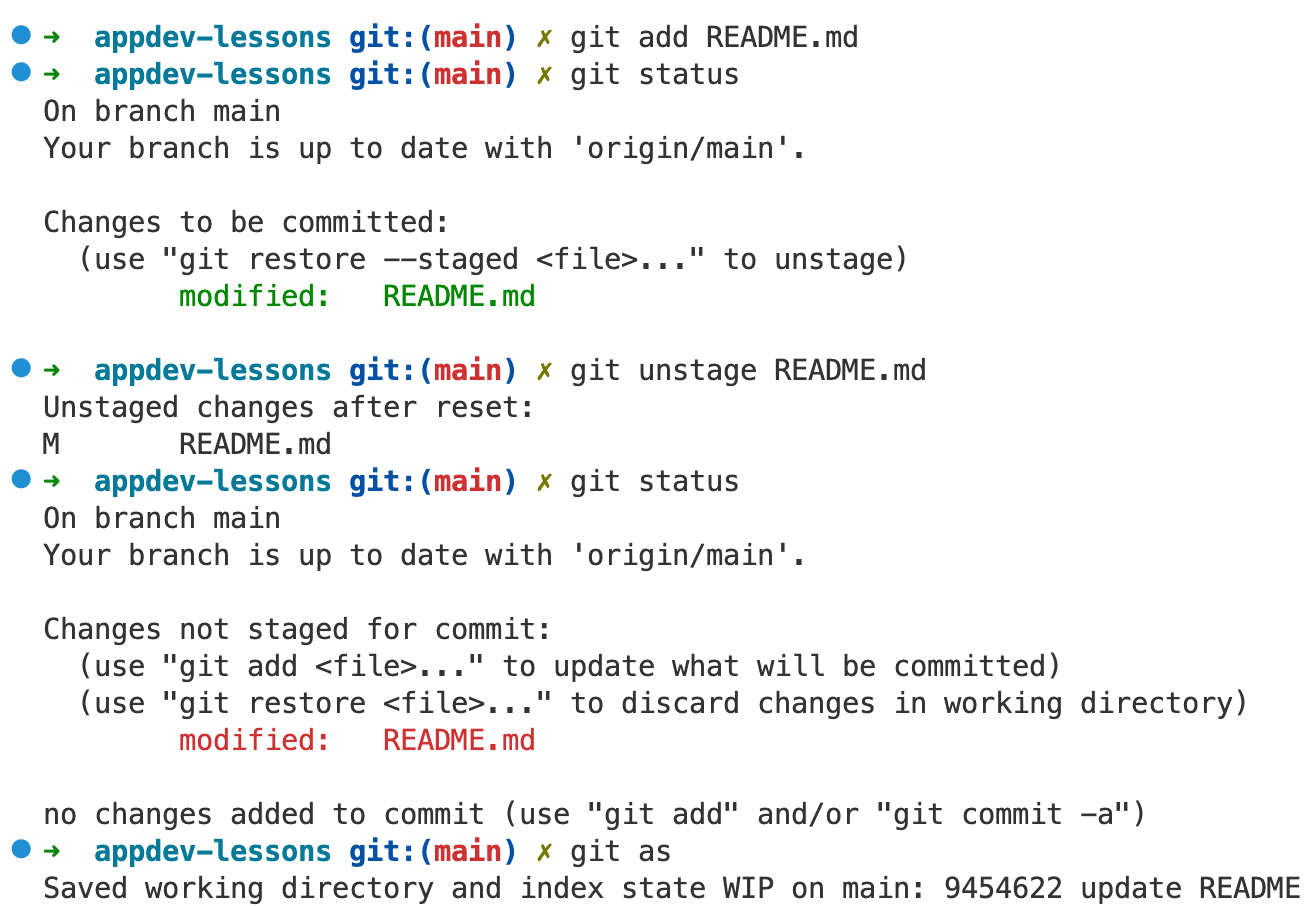
Unstage a file
We can also un-stage a file (maybe because it doesn’t make sense to include with the commit because it is unrelated to the other files!) with:
git reset file-name
I have this aliased to git unstage, because that name makes more sense.
git status
is a command you should run a lot to double check what you’re doing:
A dangerous checkout
A dangerous command is:
git checkout .
This will back out all of your changes and reset you to the previous commit. If you haven’t staged or committed the changed files, this will destroy them.
reset --soft to undo a commit
We can remove a commit from our history and reset the files to their staged state with all of the changes we made with:
git reset --soft HEAD^
HEADrefers to the current branch that you are checked out on^means one commit back (the “parent”)softmeans leave the files in the working directory and index untouched
Then we could add some more changes to the files and commit again. I have this useful command aliased as git uncommit.
Steps to completely backout of a commit
First git uncommit to re-stage the files, but undo the commit. Then git unstage (optionally providing a filename we want to unstage, or taking them all by default), to unstage the files. Then, the dangerous git checkout ., which will completely reset our code and history to how it looked before our most recent edits and commit.
Crafting history with rebase
The fourth video covers rebase. There’s a lot in there, but these are some notes on my important takeaways.
The way we want to be working is via commits on a local feature branch, then a merge to main when it’s ready.
patch and cherry-pick
We use git add --patch (rather than git add .) to selectively stage granular changes within files that we change. This will lead to a partially staged and unstaged file. We can commit, then stage again, then commit again, which will break up the commit based on how we selectively staged with --patch.
We use git diff to view the file difference in unstaged changes, or git diff --cached for the staged changes.
If we accidentally commited to main when we meant to be on a feature branch, we can use:
git diff 23532..12352
This will show differences in the files in the range specified between the two hashes with the .. notation. We use that to check which commits we want to move.
We can then checkout the feature branch: git checkout feature-branch and run:
git cherry-pick 23532..12352
This will move all the specified commits (we can also just pass a single commit rather than a range) to the feature branch. This will create new commits on the branch, it doesn’t just pick them up and move them. So we will still see those commits in main’s history. But, we know how to reset main and cleanup the history with a hard reset.
rebase
A rebase is pretty much identical to the cherry-pick workflow! In this case, we have some stuff (commits) on main and we want to move them into the feature-branch.

Here, I have the commit 7ea8c45 on my local (it’s green) main branch, but I want to move this commit and the changes associated with it into my new-git-post branch.
The first step is to checkout the feature branch. In my example, I have checked out becuase HEAD -> new-git-post.
With rebase, we want to take the work we’ve done on our feature branch (which was new-git-post here), and reapply it as if it was done on top of the additional commits in our target branch (which was main here).
Now, I’m going to make couple changes to new-git-post. Then I realize, oh, I actually would also like the change on the main branch.
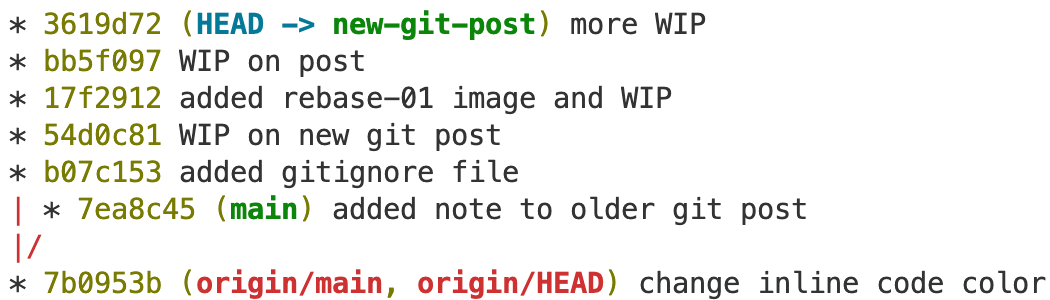
So we have b07c153 to 3619d72, which are the commits on the feature branch that I’m checked out on, and 7ea8c45, which was the commit on main that I want in the currently checked out feature branch. Now I can run:
git rebase main
And the resulting history:
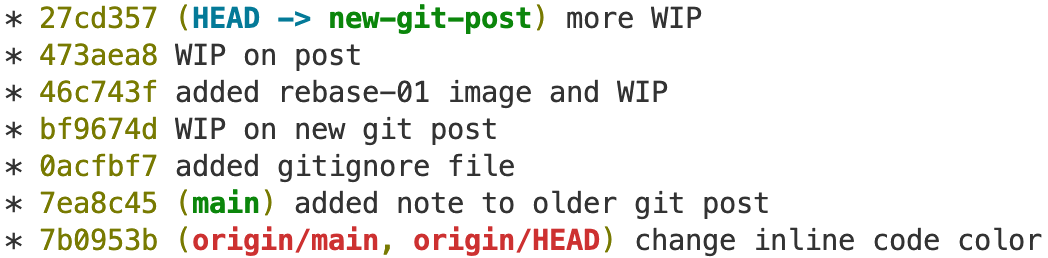
We see that the commit hashes have changed, but now the history appears that the current feature branch is a continuation of main, including the 7ea8c45 commit that we wanted to grab.
Interactive rebase
When we want to really craft the history and make the changes clear (like when we’re getting ready to merge to main), then we want to use rebase -i for interactive rebasing.
This won’t move commits, but rather revises commits in place. We use it to combine or squash commits.
We never want to revise the history like this on main, but we do want to revise the history of feature branches before merging them to main
Let’s say we wanted to take the top few commits and squash them down into one commit. We would do
git rebase main -i
This would allow me to craft a commit history by squashing all the commits except for one that I pick (the top-most in the editor). picking multiple is almost never worth it (or, alternatively, it means your branches are too long lived).
When I run the command, an editor pops up:
pick bf9674d WIP on new git post
pick 46c743f added rebase-01 image and WIP
pick 473aea8 WIP on post
pick 27cd357 more WIP
pick 22d9e46 added more images and continued WIP
pick 0afae16 WIP on interactive rebase
pick d105127 WIP
I edit that to look like:
pick bf9674d WIP on new git post
s 46c743f added rebase-01 image and WIP
s 473aea8 WIP on post
s 27cd357 more WIP
s 22d9e46 added more images and continued WIP
s 0afae16 WIP on interactive rebase
s d105127 WIP
This will squash the subsequent commits after the first commit on the branch (top-most in the editor) down into the first commit. We could pick others if there were important ones that stood out.
We get another editor when we close the file, where we wrote a longer description with all of the information about what happened up to the current point in time after the first commit that we picked:
I'm just squashing some commits to demonstrate
how to interactively rebase.

# This is a combination of 7 commits.
# This is the 1st commit message:

WIP on new git post

# This is the commit message #2:

added rebase-01 image and WIP
(Note: we could have even deleted all of the commit messages from each individual commit below this note we added.)
And when we close that, our history might look something like:

And we could continue working on our branch. But usually, these would be the steps just before we merge to main to create a cleaner history.
Interactive rebasing does not modify the code, it just modifies the commit history!
Merging to main
This isn’t in the videos, but just references one of the other posts on my blog. When the interactive rebase is done, and the history is cleaned, and we’re ready to merge to main, we can run:
git checkout main
git merge feature-branch
git push
And we can even delete the feature branch with
git branch -d feature-branch